Pinhole Camera Study
During this week we have been learning about the basics of photography. We have learned about all the different elements that make up a camera and all the necessary requirements to take a photograph, as well as some of the science behind it.
A camera is a device that captures still images and comes from the Latin “Camera Obscura”, which translated means “Dark Chamber”. This is vitally important in photography because you need to control the light in order to take a successful photograph. This is achieved with the use of a shutter that controls the amount of light that travels through the aperture. An aperture is a hole or opening of the camera's chamber where the light travels through it in straight lines which hits the photographic paper or film at the back of the chamber imprinting an upside down negative image. In photography the light is controlled in increments, these are called F-stops.
The best way for us to understand this and put it into practice was to build and use our own pinhole cameras.
Making the Pinhole Camera.
- For the body of the camera I used an old shoe box.
- I cut a small square approx 3cm x 3cm in the lid.
- I then painted the inside of the shoe box with black mat paint. The purpose of this was to ensure there were no reflective surfaces inside the chamber.
- Once the paint dried, I stuck a small square piece of foil to the inside of the square I had cut out and pierced a very tiny pinhole in the centre of the foil. This served as the camera lens.
- I then placed a dark piece of heavy card over the lens and secured it with duck tape. This served as the shutter and gave me the control I needed over light within the chamber.
I then had to find my F-Stop to help me work out my timings for how long the shutter was to be open. I used the following equation-
F-Stop = Distance from pinhole to paper (mm)/ Divided by diameter of pinhole.
In this case it was F-stop = 95mm F-stop = 118.75mm
--------
0.8mm
By that equation I estimated that my times should be 2mins 40 secs inside and 11 mins 40 seconds outside.
I then entered the dark room and familiarised myself with the rules of the dark room, for correct use of equipment and health and safety. I.e.no eating or drinking in the dark room, in case of accidental ingestion of dangerous substances. Also being careful when developing prints, ensuring I don’t spill substances on the floor causing a slipping hazard.
I then loaded my camera with photographic paper, under instruction whilst in the dark room. The camera was sealed and I then went off to try the camera I had built. Once I had selected the location and taken the photograph I returned to the dark room to develop the negative images. The photographic paper was carefully removed from the body of the camera and placed in a developer solution for 30 seconds. I then transferred this to a water for 10 Seconds and then placed in the finish for an initial 30 seconds. I left the Dark room to check the negatives I produced and then returned to the dark room and returned the prints to the finish and left them for about 5- minutes. From there they were transferred to water again and left to rinse for a further minute before they were put through a dryer.
The following are photographs that I captured-

(b)

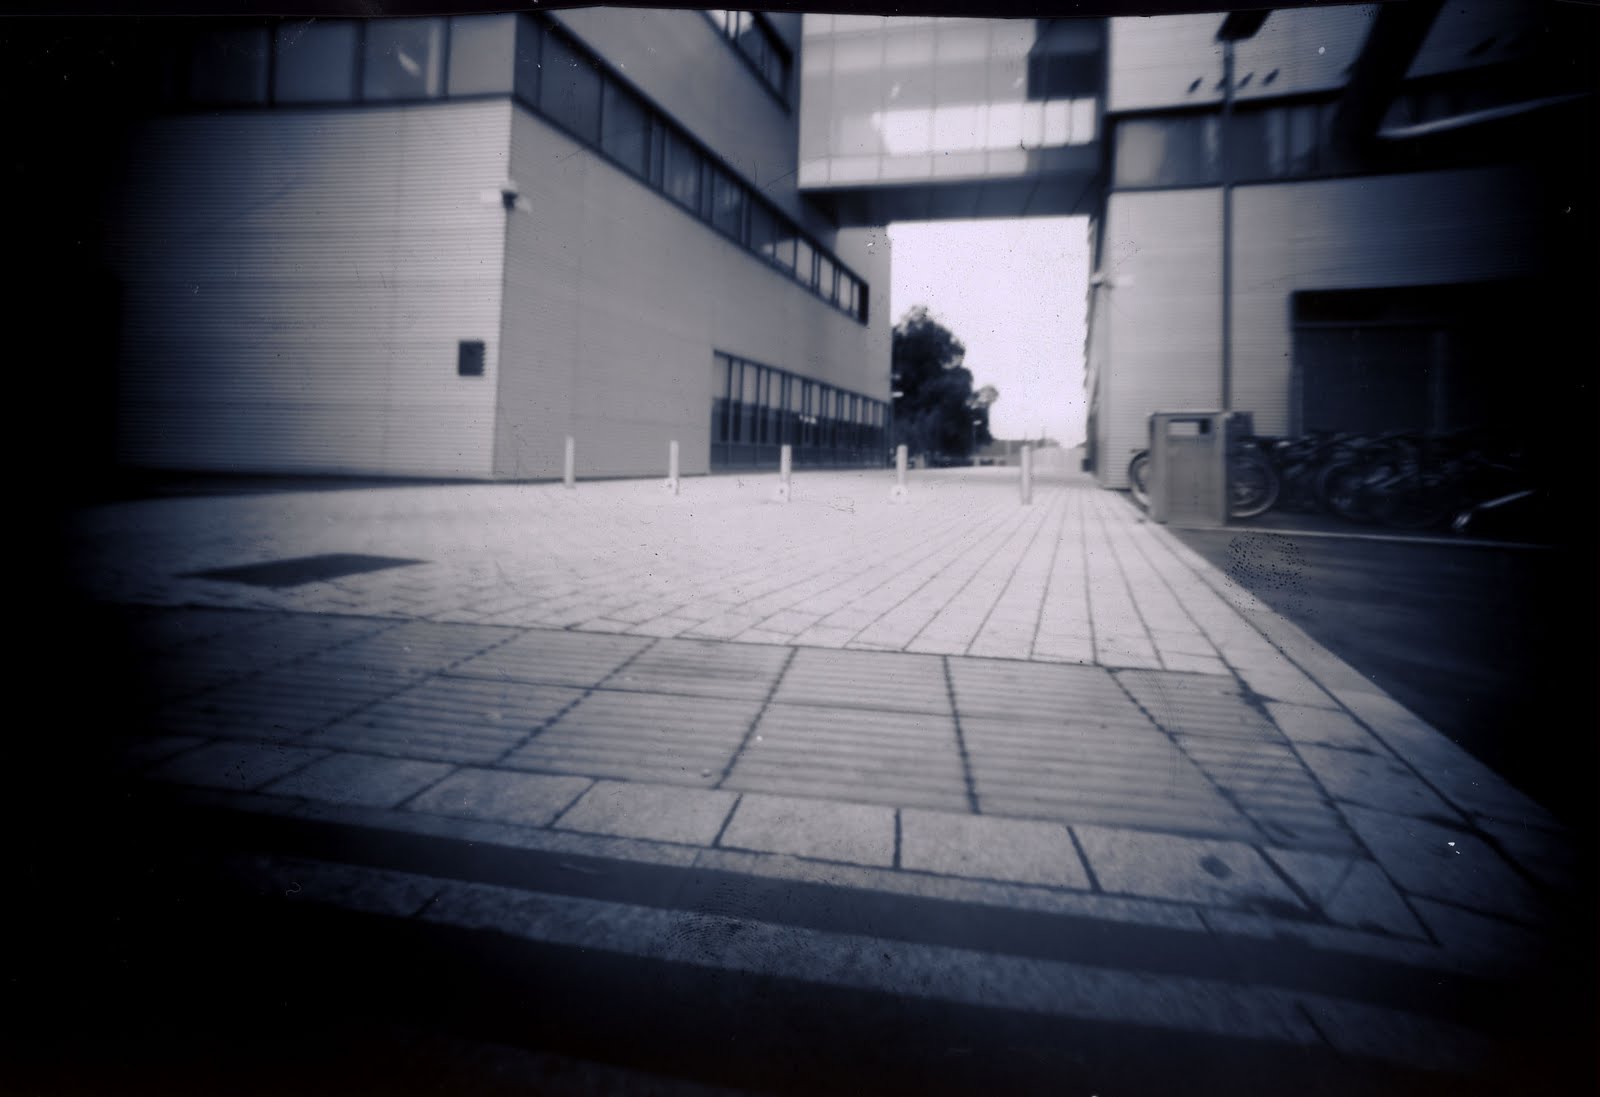
I managed to get a good result outside in photograph (a) However photograph (b) was taken outside under shade with an overcast sky. There were also a lot of shadows and detail to capture. (c) was taken of the same location over the longer time of 4 mins 40 secs. This brought out the majority of the detail and shadows, however is a little dark. (d) Was taken inside pointing at the podium of the film theatre. I increased the timing very slightly to 13 mins however managed to capture nothing. In retrospect the choice of shot was a misjudged as the forward lights of the theatre were off. Had I have stood at the front of the theatre and taken a picture of the seats leading up to the back of the theatre then I would probably have got a much better result as the rest of the lights were all on and it was better lighting for what I needed.
(a)
(b)

(c)


(d)


I managed to get a good result outside in photograph (a) However photograph (b) was taken outside under shade with an overcast sky. There were also a lot of shadows and detail to capture. (c) was taken of the same location over the longer time of 4 mins 40 secs. This brought out the majority of the detail and shadows, however is a little dark. (d) Was taken inside pointing at the podium of the film theatre. I increased the timing very slightly to 13 mins however managed to capture nothing. In retrospect the choice of shot was a misjudged as the forward lights of the theatre were off. Had I have stood at the front of the theatre and taken a picture of the seats leading up to the back of the theatre then I would probably have got a much better result as the rest of the lights were all on and it was better lighting for what I needed.
Further research on pinhole photography.
I was fascinated to discover that the earliest references to pinhole photography were in Chinese texts as early as the fifth century BC, according to Jon Grapsted http://photo.net/learn/pinhole/pinhole He also goes on to explain that the pinhole theory was used widely throughout the renaissance period for astronomy and by artists and amateur painters as a drawing aid. Regardless of this history Grepstad points out that the first pinhole photographs didn't actually appear until the 1850s.
For my homework assignment I had to look at various pinhole photography sites and work by experienced photographers. It was interesting to see the various techniques used and I thought that some of the results that the photographers achieved were amazing.
Here are a few examples of the the work I liked the most-
http://www.pinholeformat.com/dhb4.html Photographer: Diana Hooper Bloomfield "Annalee"

This is a fantastic photograph, as the landscape has some great detail and the subject appears to have been caught moving throughout the time the photograph was taken. This you can see as the subject is blurred and she has left a trail where she has passed through the picture. I believe that gold toning was also used to produce this photograph as it is a reddish brown colour.
http://users.rcn.com/stewoody/pitts.htm Photographer: Stewart L Woodruff

This black and white pinhole photograph of a stuntplane was taken with an oatmeal box. The subject has stood completely still for the duration that the photograph was taken. I love the way that the plane has been stretched to give it a panoramic look.
http://www.pinhole.nl/flowers/index.htm Photographer Bethany De Forest "Flowers"

After visiting the above site and being met by some crazy sound effects I came across this photograph. This is an amazing landscape photograph and I love the colours.
Evaluation of my pinhole photography-
Bibliography-
Grepstad J (1996) Pinhole Photography History, Images, Cameras, Formulas
http://photo.net/learn/pinole/pinhole (Accessed 15/09/2010)
Bloomfield D H (2001) The Pinhole Format Gallery
http://pinholeformat.com/gallery.html (Accessed 15/09/2010)
Woodruff S L (unknown) Oatmeal Box Pinhole Photo Gallery
http://users.rcn.com/stewoody/index.htm (Accessed 15/09/2010)
Forest B D (Unknown) Landscape
http://www.pinhole.nl/ (Accessed 15/09/2010)
Here are a few examples of the the work I liked the most-
http://www.pinholeformat.com/dhb4.html Photographer: Diana Hooper Bloomfield "Annalee"

This is a fantastic photograph, as the landscape has some great detail and the subject appears to have been caught moving throughout the time the photograph was taken. This you can see as the subject is blurred and she has left a trail where she has passed through the picture. I believe that gold toning was also used to produce this photograph as it is a reddish brown colour.
http://users.rcn.com/stewoody/pitts.htm Photographer: Stewart L Woodruff

This black and white pinhole photograph of a stuntplane was taken with an oatmeal box. The subject has stood completely still for the duration that the photograph was taken. I love the way that the plane has been stretched to give it a panoramic look.
http://www.pinhole.nl/flowers/index.htm Photographer Bethany De Forest "Flowers"

After visiting the above site and being met by some crazy sound effects I came across this photograph. This is an amazing landscape photograph and I love the colours.
Evaluation of my pinhole photography-
I have enjoyed working on the pinhole camera project as it has taught me a great deal about the basics of photography. I think this a very old and simple form of photography and is a perfect starting point for to learn about photography.
Although I was disappointed with some of the results that I got I did learn some valuable lessons. I would look to use a smaller body for example a Pringles Box instead of a shoe box. I would also ensure that the times for taking the photographs are more accurate. I would look very carefully at the lighting at the locations I am trying to take the photographs to get good results.
Bibliography-
Grepstad J (1996) Pinhole Photography History, Images, Cameras, Formulas
http://photo.net/learn/pinole/pinhole (Accessed 15/09/2010)
Bloomfield D H (2001) The Pinhole Format Gallery
http://pinholeformat.com/gallery.html (Accessed 15/09/2010)
Woodruff S L (unknown) Oatmeal Box Pinhole Photo Gallery
http://users.rcn.com/stewoody/index.htm (Accessed 15/09/2010)
Forest B D (Unknown) Landscape
http://www.pinhole.nl/ (Accessed 15/09/2010)